Warranties & claims
Issue a numbered warranty certificate when a job is finished, find it later by number or phone, and log and settle warranty claims.
What it is
A warranty is a numbered promise attached to a finished job. It records the film used, the install date, how many months it lasts and the expiry date, plus your warranty terms. Each one has a printable Warranty certificate. Warranty numbers follow the pattern TW + two-digit year + a running number, for example TW26-0001.
When a customer comes back with a problem (peeling, bubbling, fading), you register a claim against the warranty and track it to a decision.
Who uses it
- Owner / manager issues warranties and decides claims (approve, reject, resolve).
- Front desk looks up a customer's warranty and registers new claims.
- Customers download their certificate from the customer portal.
Why it matters
A proper certificate makes the sale feel premium and backs up the film maker's warranty. When a claim comes in, you can see in seconds whether the warranty is valid, which film was used, the before/after photos on the job, and the history of earlier claims, so you do not argue from memory.
How to use it
Issue a warranty
- Finish the job: it must be Completed or Delivered (usually after passing quality inspection).
- Open the job from Tinting → Jobs & quotations.
- In the Warranty panel the months box is already filled from the first film on the job (the film's warranty months, or 12 if none is set). Change it if needed.
- Click Issue warranty.
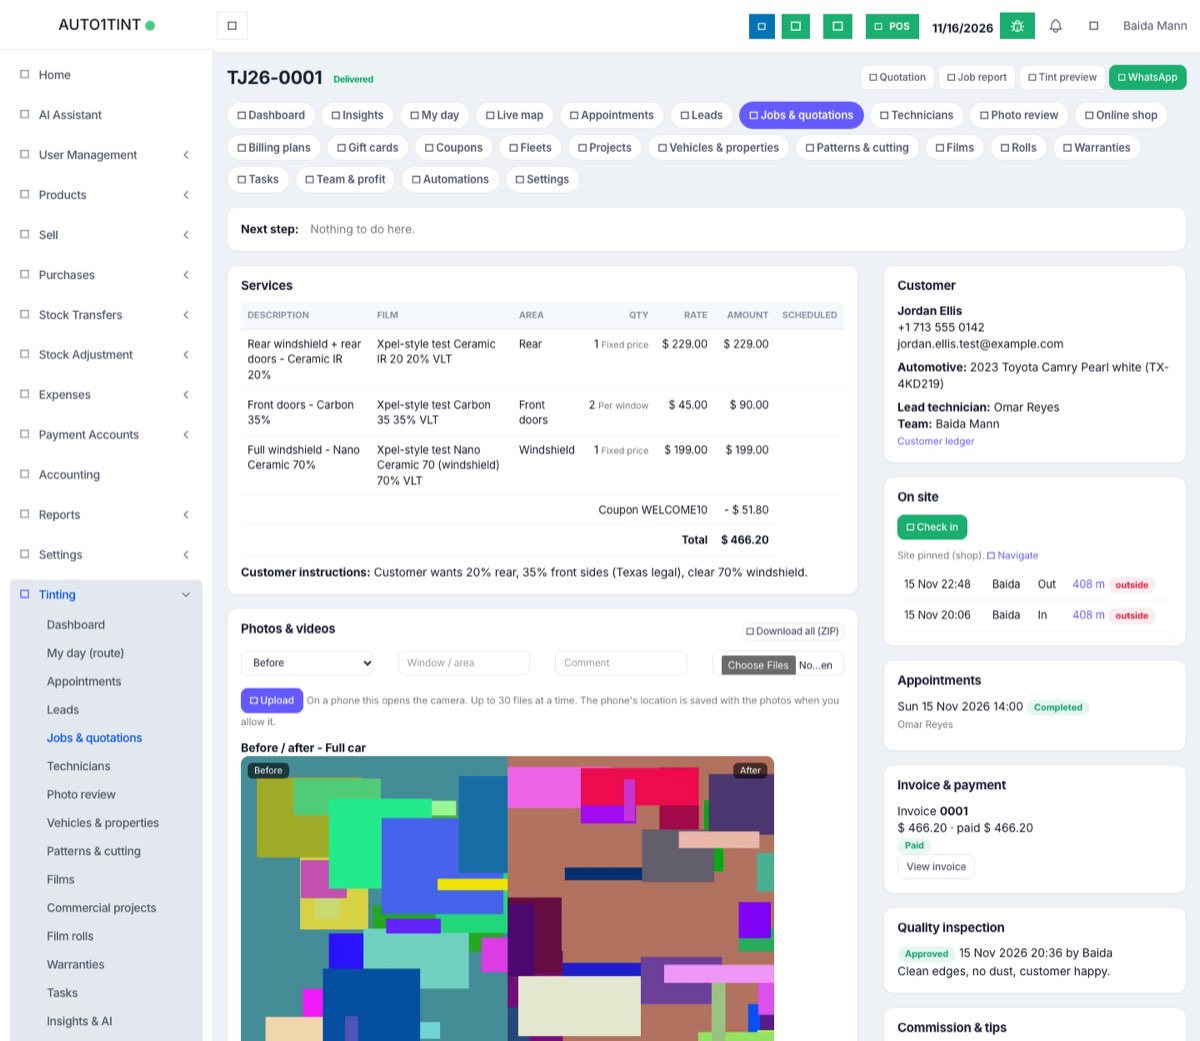
The warranty starts on the job's completion date and ends that many months later. The terms come from Warranty terms in Tinting → Settings. In our test, job TJ26-0001 for Jordan Ellis got warranty TW26-0001 for 120 months, because the ceramic film was set to a 120-month warranty in films.
Print the certificate
Click Certificate on the job card or on the warranties list. It opens a print page with the customer, vehicle or property, the film and its specification (VLT, UV, IR and TSER), install date, warranty period and expiry, the terms, and a signature line. Use your browser's print to print or save as PDF.
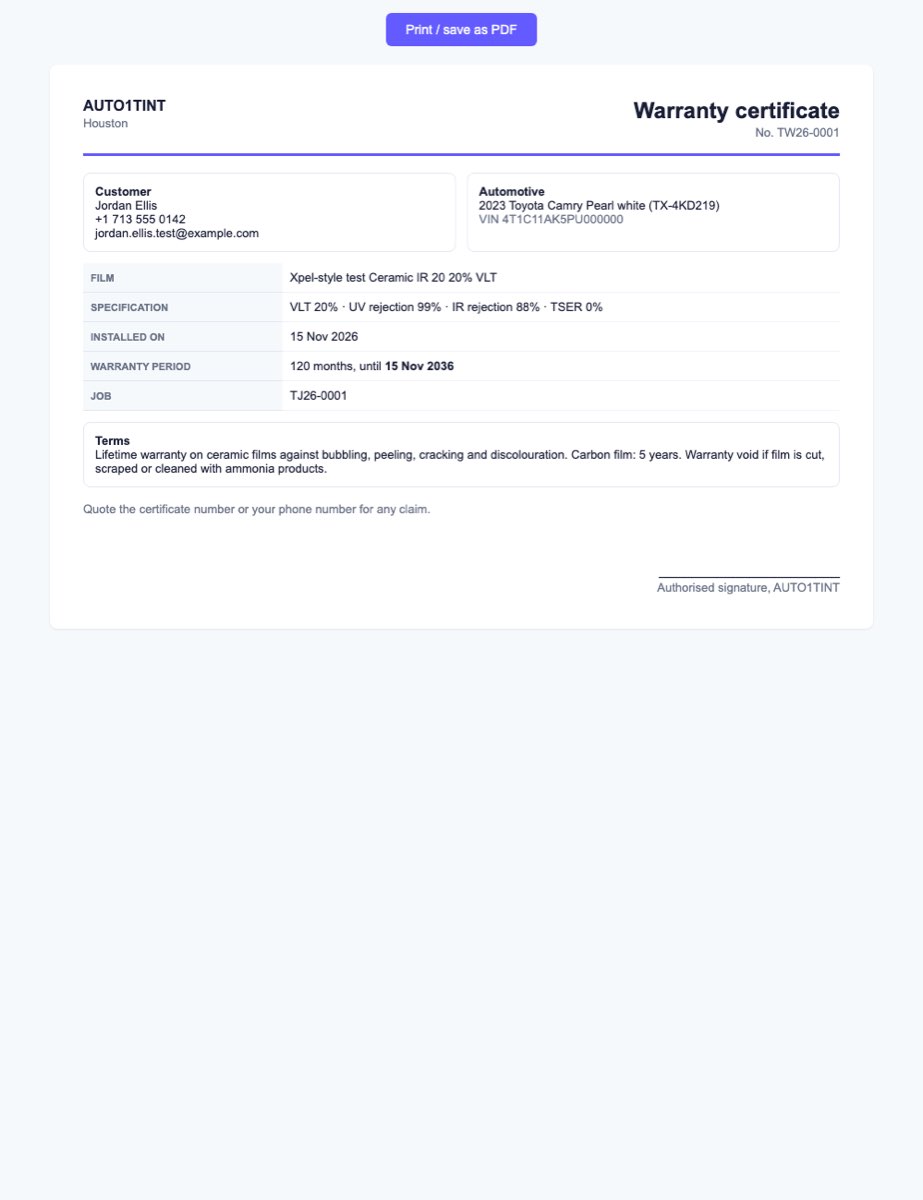
Customers can open the same certificate from their portal once the job is complete.
Find a warranty
- Go to Tinting → Warranties.
- Search by certificate number, customer name or phone, then click the search button.
- Tick Expiring in 60 days to see warranties ending soon.
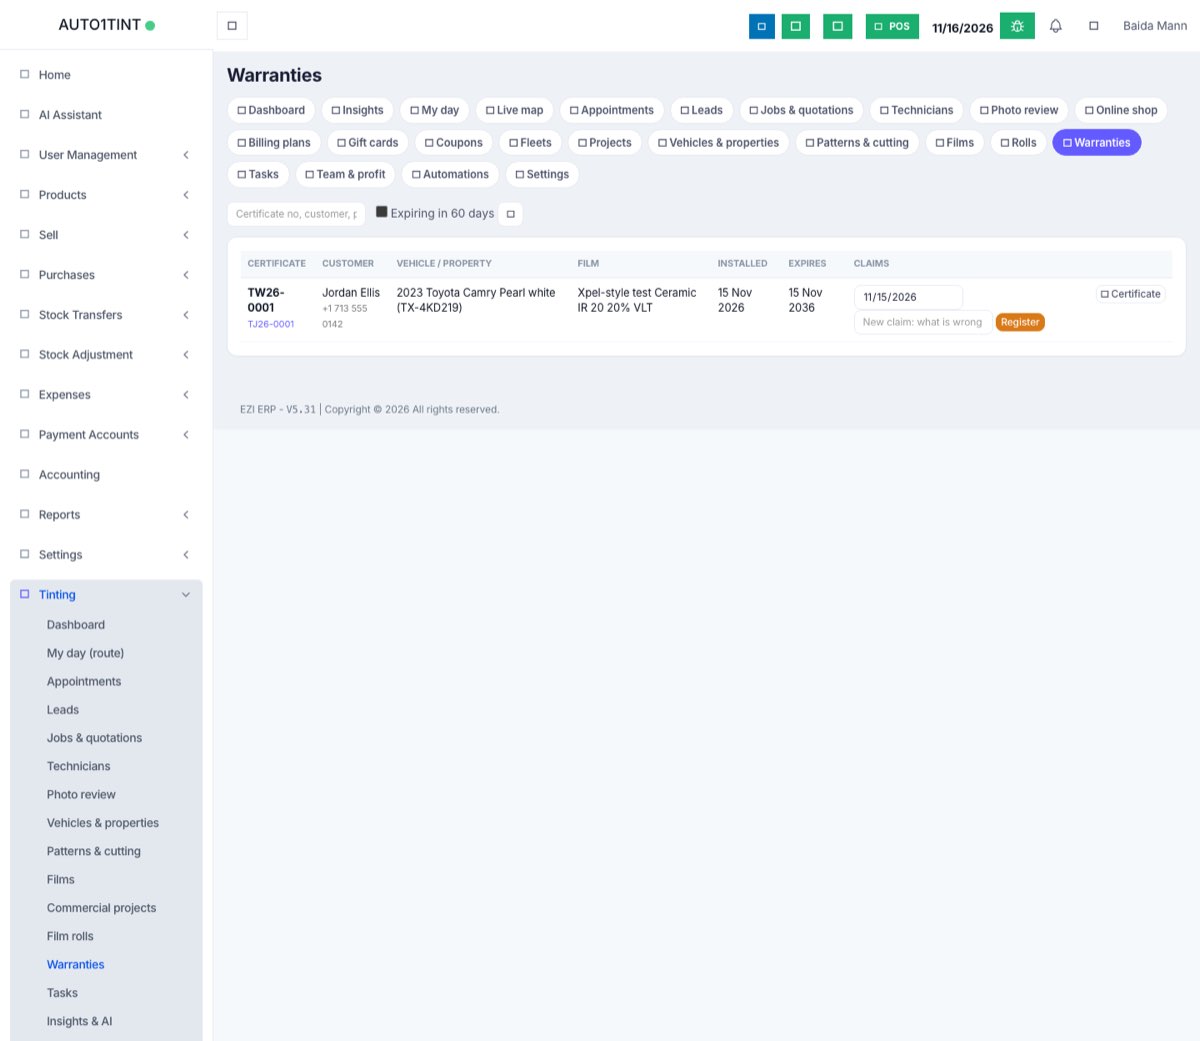
Each row shows the certificate and job number, customer, vehicle or property, film, installed and expiry dates. Expired warranties have a red Expired badge.
Register a claim
- On Tinting → Warranties, find the warranty.
- In the Claims column, set the date and type what is wrong in New claim: what is wrong.
- Click Register.
If the warranty has already ended, the claim is still saved but you get a note: "Note: this warranty expired on …".
Decide a claim
- Under the claim, choose a status: open, approved, rejected or resolved.
- Type the Resolution (for example "Re-tinted rear door free of charge").
- Click Save.
Rules & limits
- Only tinting.manage users can issue warranties and change claim status.
- Any user with tinting.access can view warranties, print certificates and register claims.
- A warranty can only be issued for a Completed or Delivered job ("Complete the job first.").
- One warranty per job ("This job already has a warranty.").
- Months must be between 1 and 1200.
- Numbers start again each year (TW26-…, TW27-…).
Tips
- Set the right warranty months on each film in Tinting → Films, so the box is pre-filled correctly.
- Write clear exclusions in Warranty terms (scratches, ammonia cleaners, cutting) so claims are easy to judge.
- Before deciding a claim, open the job from the warranty row and check the After photos.
- An automation with the warranty-expiring trigger can remind customers before their cover ends (see automations).