Products, units, brands and categories
Set up the items you buy and sell, with prices, stock, variations, barcodes and labels, so sales and stock reports are correct.
What it is
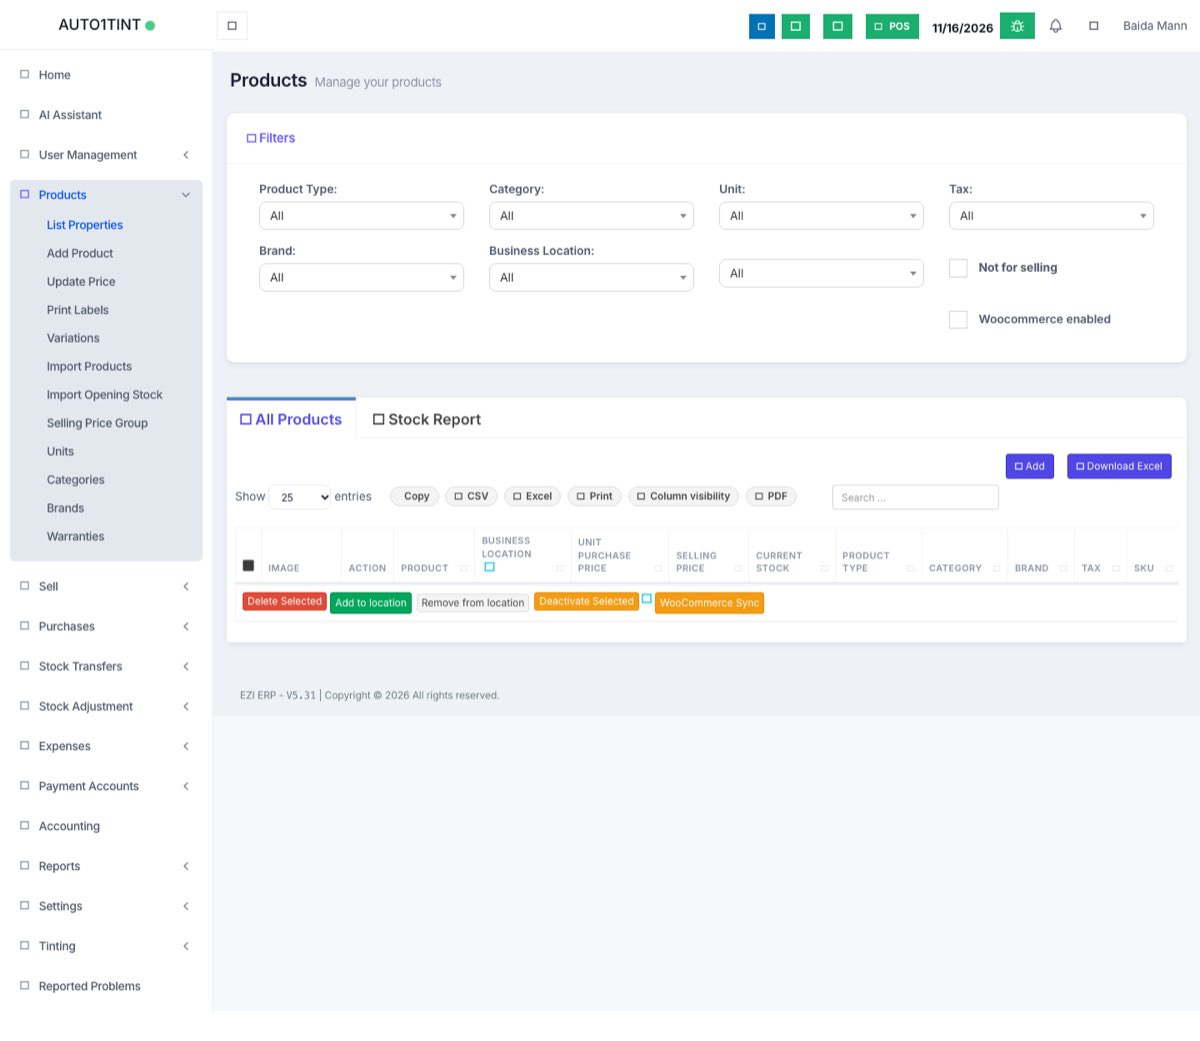
A product is anything you buy, stock or sell: a physical item, a service, or a combination. The Products menu holds your product list plus the building blocks that describe products – units, categories, brands, variations, warranties and selling price groups. In the menu the product list is called List Properties.
Why you would use it
- Sales and purchases pick products from this list, so prices and stock update automatically.
- Stock alerts, expiry and profit reports all depend on correct product data.
- Barcode labels let staff scan items at the POS instead of typing.
How to use it
Set up the building blocks first
Under Products you will find:
- Units – how you count (Pieces, Kg, Box). A unit can have sub units (1 Box = 12 Pieces).
- Categories – groups and sub-groups, e.g. Electronics > Phones.
- Brands – the maker.
- Variations – reusable variation sets such as Size (S, M, L) or Colour.
- Warranties – name, description and Duration (days, months or years) printed on invoices.
- Selling Price Group – extra price lists (e.g. Wholesale). See tips below.
Add a product
- Go to Products > Add Product.
- Enter Product Name. Leave SKU empty to auto generate a code.
- Choose Unit, Brand, Category and the Business Locations where it is sold.
- Tick Manage Stock? for physical goods and set an Alert quantity. Leave it unticked for services.
- Optionally add a description, image, weight and warranty.
- Choose Product Type:
- Single – one price, one SKU.
- Variable – one product with variations, each with its own price and stock (e.g. a shirt in three sizes).
- Combo – a bundle of other products sold together.
- Enter the price: Default Purchase Price, profit Margin(%), and the Default Selling Price is worked out for you (you can override it). Pick the Applicable Tax.
- Click one of the save buttons:
- Save – done.
- Save & Add Opening Stock – enter stock you already have at each location.
- Save & Add Selling-Price-Group Prices – set wholesale or other group prices.
- Save And Add Another – start the next product.
Manage the product list
Open Products > List Properties. Use Filters (Product Type, Category, Unit, Tax, Brand, Business Location, Active/Inactive/Not selling). From the Action button you can View, Edit, Delete, add or edit opening stock, see Product stock history and Duplicate Product. Tick several rows for bulk actions such as delete, deactivate or change location. Download Excel exports the list.
Prices in bulk
Products > Update Price lets you export prices to Excel, change them and import them back.
Import products and opening stock
- Products > Import Products – download the template, fill it in, upload.
- Products > Import Opening Stock – upload SKU, Location, Quantity, Unit Cost (Before Tax), and optional Lot Number / Expiry Date.
Print labels and barcodes
- Go to Products > Print Labels.
- Search and add products and set No. of labels for each.
- Under Information to show in Labels, tick what to print (Product Name, Product Variation, Product Price inc./exc. tax, Business name, packing date, lot number, expiry date).
- Choose the barcode sticker setting and click Preview, then print.
Tips / common questions
- Opening stock vs purchase: use opening stock only once, for stock you had before starting. New stock always comes in through Purchases.
- Selling price groups must also be enabled on a location or customer group to take effect. See Business locations.
- Wrong stock? Fix it with a stock adjustment, not by editing the product. See Stock transfers and adjustments.
- Label paper sizes are set in Settings > Barcode Settings. See Invoice settings, barcodes, printers and tax.