"Field service: My day, GPS check-in & live map"
Plan the technician's driving route, tell customers you are on the way, prove arrival with GPS check-in, and see the team on a live map.
What it is
The field service tools are for jobs done at a customer's home, office or car park, and for proving time spent on jobs at the shop. They are:
- My day: today's stops in the best driving order, with arrival times and a Google Maps route.
- On my way: one tap records that you have left and works out an arrival time (ETA), which you can send by WhatsApp.
- GPS check-in / check-out on the job page: records when and where the technician arrived and left, and flags check-ins far from the site.
- Share my location (opt-in) and the manager's Live map.
- Travel report: distance, travelling time and time on site per technician per day.
Who uses it
- Technicians (
tinting.access): My day, On my way, Check in / Check out, and sharing their location. - Owner / manager (
tinting.manage): any technician's day, Re-time appointments to this route, Pin site where I am, Live map and Travel report. - Customers get the "on my way" message with the arrival time.
Why it matters
Customers want to know when you will arrive, and owners want proof that work happened where and when it was billed. A shorter route also saves fuel and time.
How to use it
1. Set the shop pin and site radius
In Tinting → Settings → Field service (GPS check-in), enter Shop latitude and Shop longitude (or press the crosshair button while standing in the shop) and a Site radius (metres), which is 300 by default. Also check Average driving speed (km/h) in the Manager card. See Settings.
- Vehicle jobs are checked against the shop pin.
- Property jobs are checked against the property's own pin. The first check-in at a property with no pin sets it. A manager can also open the job and press Pin site where I am while standing there.
2. Plan the day: Tinting → My day
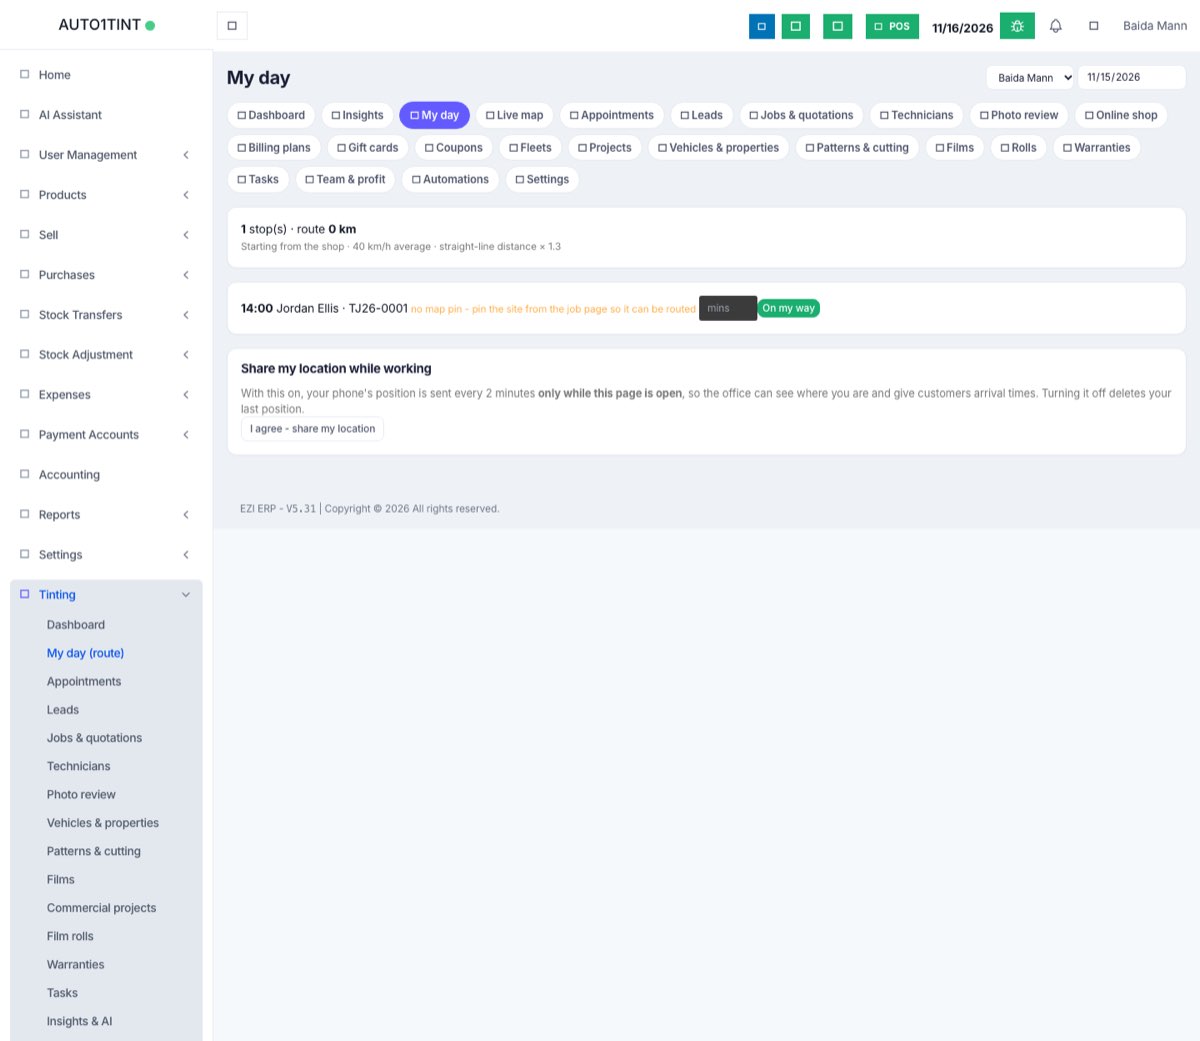
- Open Tinting → My day. A manager can pick any technician and any date at the top.
- Each stop shows the booked time, distance, drive time and an estimated arrival. A stop with a red border means the technician would arrive more than 15 minutes late.
- Click Open route in Google Maps for turn-by-turn directions through all stops, or Navigate for a single stop.
- The route starts from your live position (if you are sharing it) or from the shop. If neither is set, you see "Set the shop location in Settings (or share your location) so routes start from the right place."
- A manager can click Re-time appointments to this route to change each start time to its arrival time. Confirmed bookings become Rescheduled, so let the customers know.
Routing uses map pins on properties. Stops without one (for example a car job at a customer's address) are listed separately with "no map pin - pin the site from the job page so it can be routed".
3. Tell the customer: On my way
Press On my way on a stop. The phone shares its position once, and the system works out the ETA from the distance and average speed (30 minutes if it cannot). You see "Marked on the way, arriving about 10:40." and a green Send the "on my way" message button that opens WhatsApp with the text already written. If you have an automation on the Technician on the way trigger, the message can go automatically. See Automations & tasks. For stops with no pin, type the minutes yourself before pressing the button.
4. Arrive and leave: Check in / Check out
On the job page, the On site panel has Check in and, once you are checked in, Check out. The browser asks permission to use your location. Allow it.
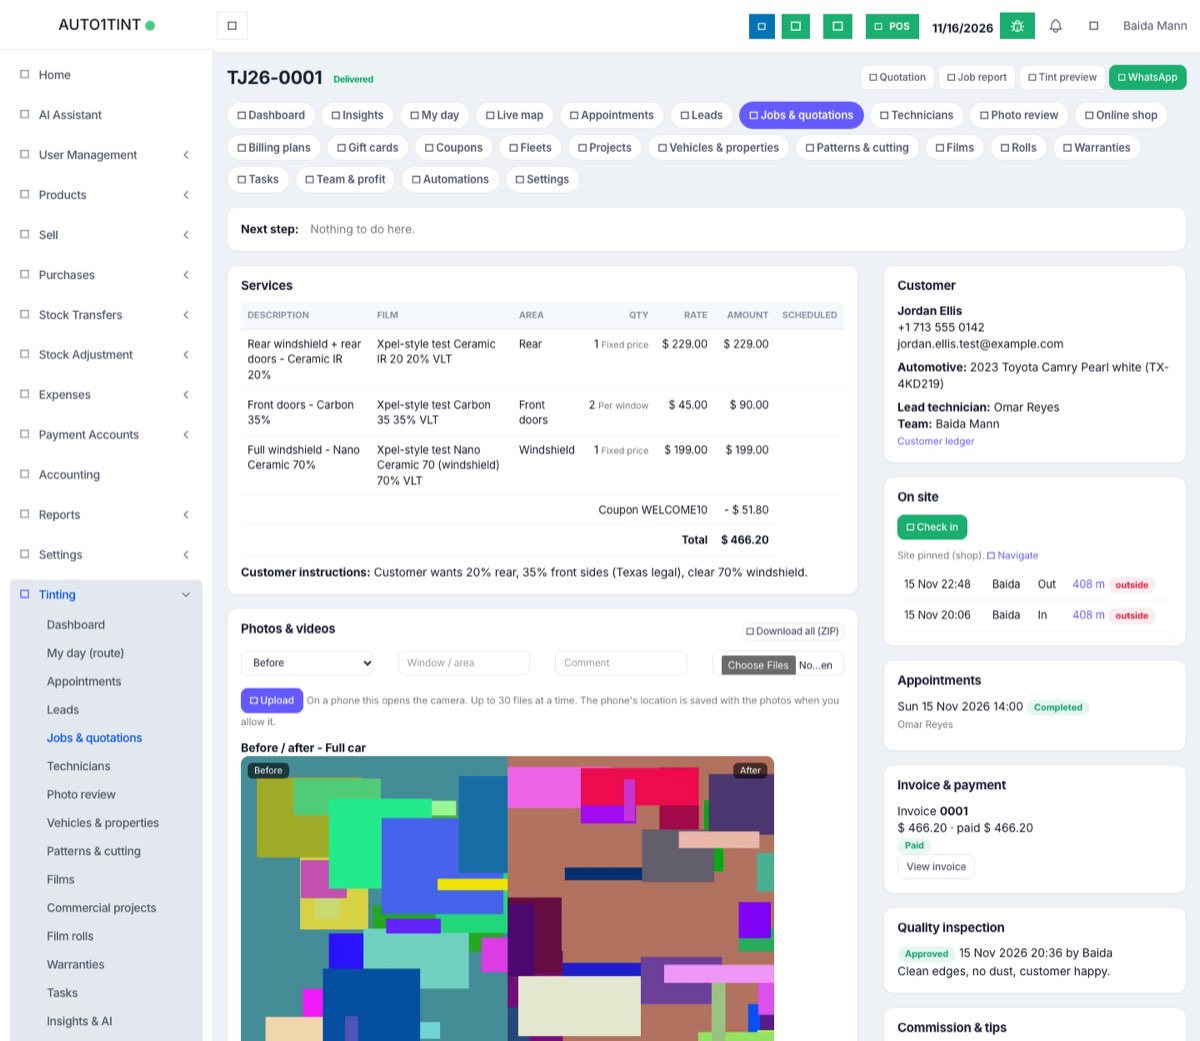
- Check-in records the time, position and distance from the site, for example "Checked in, 42 m from the shop."
- Checking in on a job that is Quotation approved or Scheduled moves it to In progress automatically.
- Check-out shows the time on site, for example "Checked out after 3 hours 5 minutes."
- If the check-in is clearly outside the radius, the message ends with "This is outside the 300 m site radius and is flagged for the manager." The check-in is still saved, marked outside.
- If location was not shared, the message says "No location was shared." and the check-in is saved without a position.
5. Share location and the Live map
At the bottom of My day, a technician can press I agree - share my location. The phone then sends its position every 2 minutes only while that page is open. Stop sharing deletes the last position.
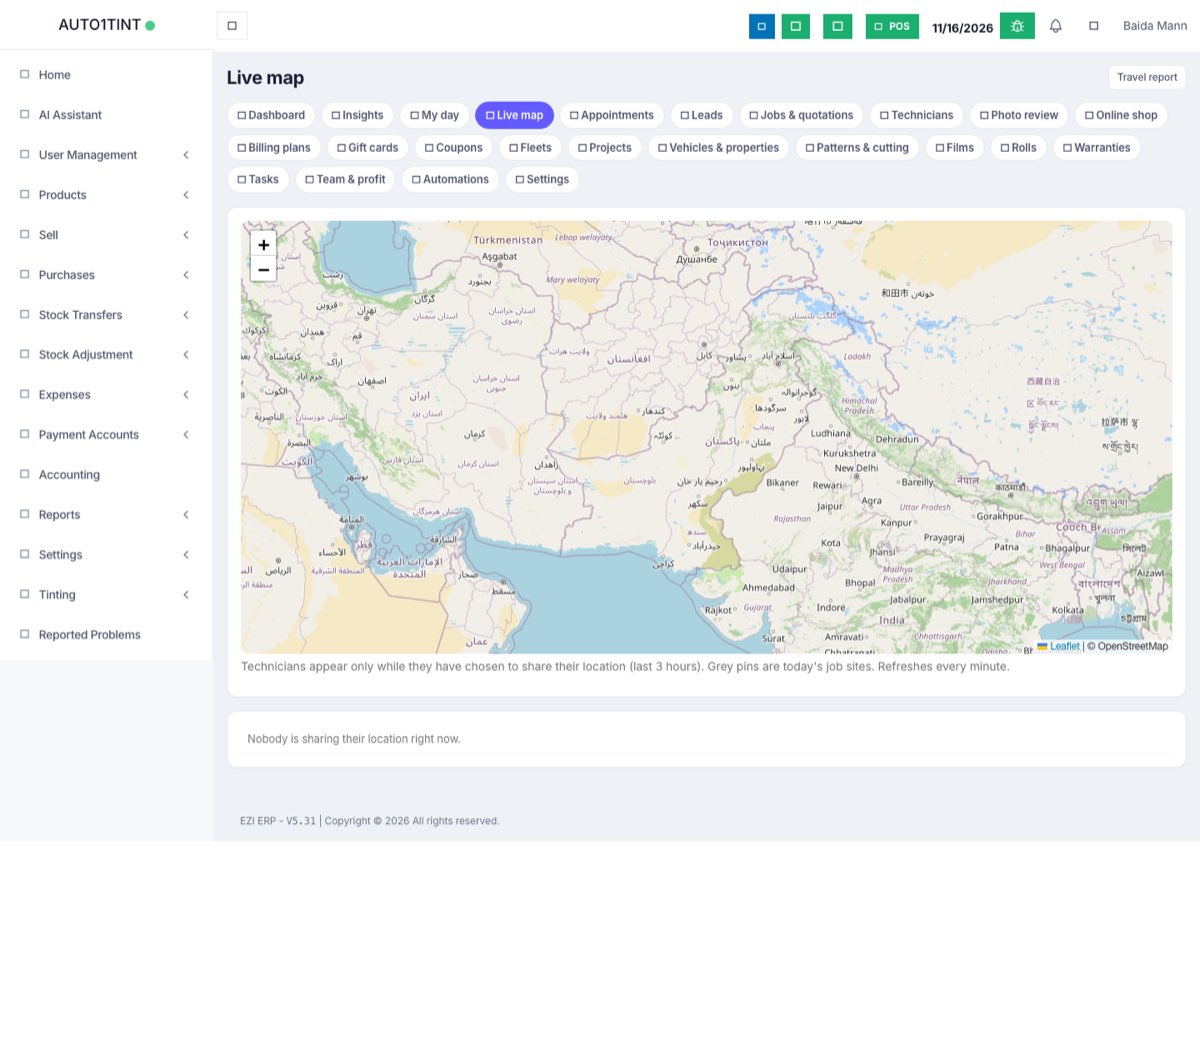
Managers open Tinting → Live map to see sharing technicians (last 3 hours) and grey pins for today's job sites. The map refreshes every minute.
6. Travel report
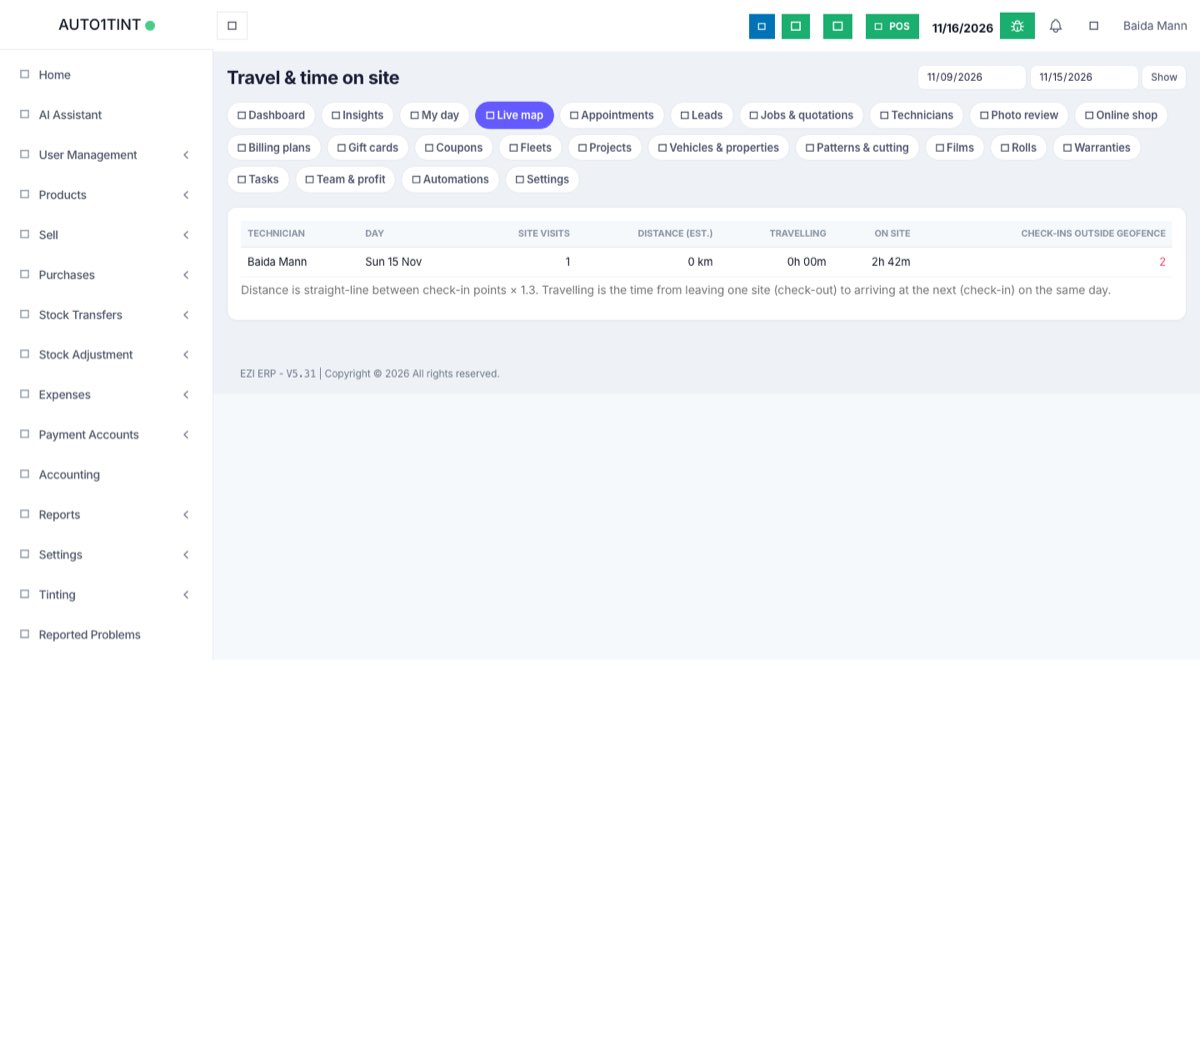
On the Live map, click Travel report and pick a date range. For each technician and day it shows Site visits, Distance (est.), Travelling, On site and Check-ins outside geofence.
Rules & limits
- Only people on the job (lead or team) or a manager can check in.
- You cannot check in twice ("You are already checked in since 09:12.") or check out before checking in ("Check in first.").
- The radius check allows for the phone's own GPS accuracy, so only check-ins that are clearly outside are flagged. With no shop pin, vehicle jobs are not checked at all.
- Location is never stored without the technician's consent. Outside sharing, it is taken only at check-in, check-out and "On my way".
- Distances and ETAs are estimates: straight-line distance × 1.3 at your average speed, with no live traffic. Distance in the travel report runs from one check-in to the next.
- Pin site where I am, Re-time appointments to this route, Live map and Travel report need
tinting.manage.
Tips
- In the mobile app, allow location once and check-in becomes one tap.
- If check-ins keep getting flagged at one house, the pin is probably wrong. Stand at the door and press Pin site where I am.
- Flags also show on the Technicians page. Indoor GPS can be poor, so ask before assuming anything.