Online booking and deposits
Let customers book from your website or your own online shop page, optionally paying a deposit, with every booking landing in EZI ERP automatically.
What it is
There are two ways customers can book online:
- The online shop: a ready-made public booking page hosted by EZI ERP at
/book/<your business number>. Customers pick services and prices for their vehicle type, see open time slots, add a coupon or referral code and send a request. - The WordPress plugin "EZI ERP Tint Booking": a simple booking form you put on your own WordPress site with the shortcode
[ezi_tint_booking].
Both create, in one go: the customer (or find the existing one by phone number), the vehicle, a Requested appointment and a New lead. Online-shop bookings also create a quotation with the chosen services. If you charge a deposit, the customer is sent to a card payment page.
Who uses it
- Customers book and pay the deposit.
- Owner or manager sets up the shop, the plugin, the deposit and the payment gateway.
- Front desk confirms requested appointments on the calendar and follows up the lead.
Why it matters
Customers book at night and on weekends. A deposit cuts no-shows, and nobody has to retype details from emails.
How to use it
Set up the online shop
- Go to Tinting → Online shop.
- Click Add sample services to fill an empty shop with a ready-made tint, PPF, coating and starlight list with pictures, or + Add service to build your own. Sample prices are examples: change them to yours.
- For each service set Category, Name, Description, Time (minutes), Film used, Order, a Picture, and either option rows (for example Coupe, Sedan, SUV, Truck, each with a Price and an optional Was price shown crossed out) or a Single price. Click Save.
- Use the on/off button on each row to hide or show a service.
- In Shop settings & time slots set Open days, Opens, Closes, Start times every (10–60 minutes), Bays (cars at once), Minimum notice (hours), Book up to (days ahead), Tax shown (%), Brand colour, the Top of page texts (Small line, Headline, Text under headline, selling points), Big picture, and the notice shown by the calendar.
- Tick Shop live and click Save settings.
- Use Copy link or Open shop. Share the link on your website, Google profile, Instagram bio and WhatsApp.
On the public page the customer fills the Cart, picks a Day & Time, enters Customer Info and Vehicle Info, can tick the reminder and offers opt-ins, and clicks Submit Request.
Set up the WordPress plugin
- Upload and activate the plugin folder
eziline-tint-bookingon your WordPress site. - In WordPress open Settings → Tint Booking.
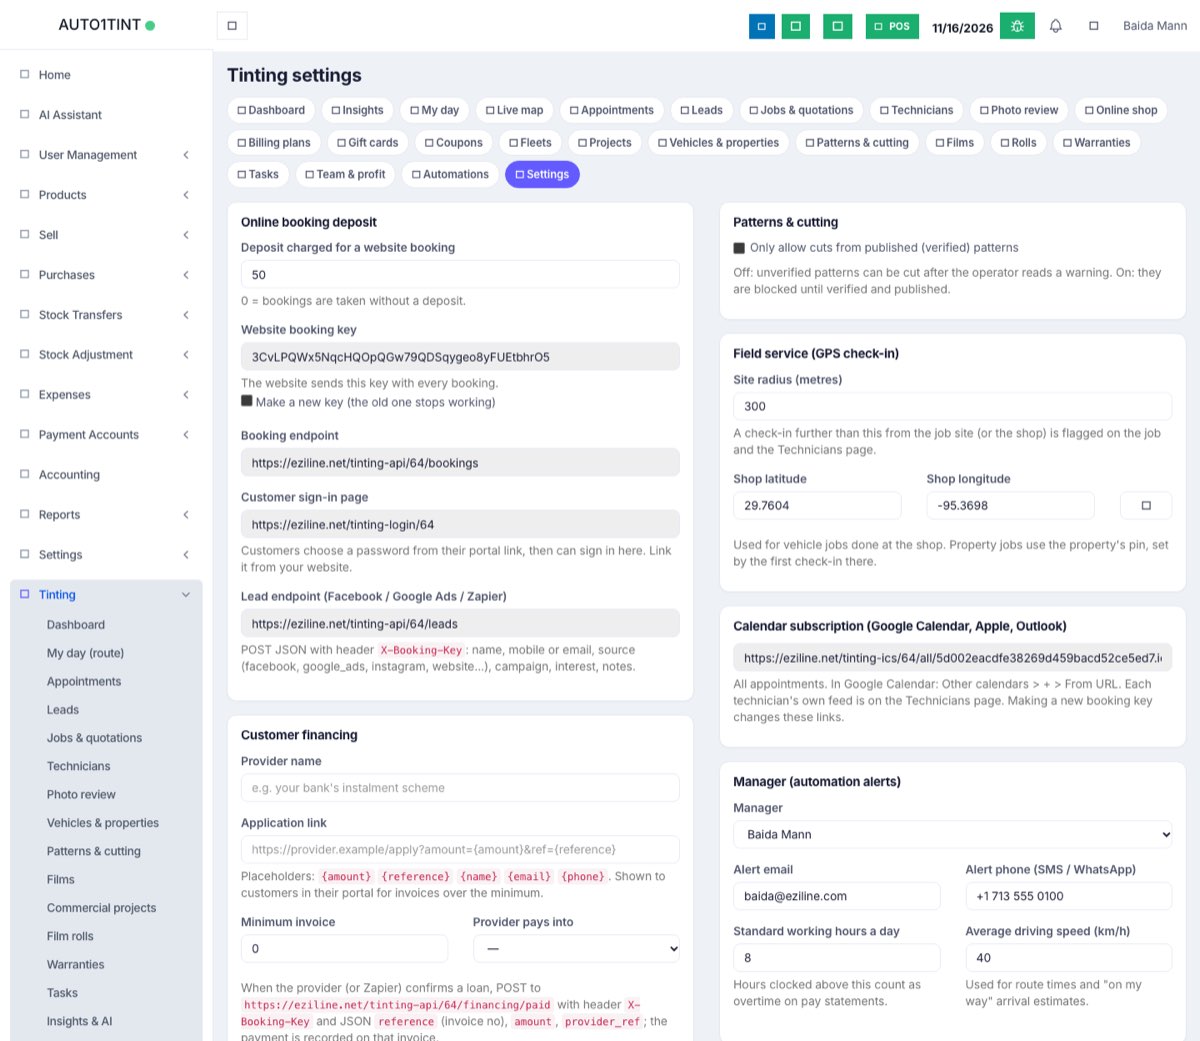
- Copy from Tinting → Settings in EZI ERP: the ERP address, the Business ID (the number inside the Booking endpoint address,
/tinting-api/<number>/bookings) and the Website booking key. Optionally add a Thank-you page (where customers land after paying). Save. - Put
[ezi_tint_booking]on any page.
The form asks for name, phone, email, service, vehicle make/model/year, plate, address, Preferred date and time, Referral code and notes, and has a Book now button. The key is sent server-to-server, so it never appears in the visitor's browser.
Your own form (booking API)
Developers can POST JSON to the Booking endpoint with the header X-Booking-Key. Required: name, mobile, service, preferred_at (a future date and time). Optional: email, vehicle_make, vehicle_model, vehicle_year, reg_no, address, notes, campaign, referral_code, success_url, cancel_url. The reply includes booking_id, deposit_required and, when a deposit is due, payment_url.
How the deposit works
- In Tinting → Settings set Deposit charged for a website booking (0 = no deposit).
- Connect Stripe or Clover on the same page (see Settings).
- After booking, the customer is sent to the card payment page. When the gateway confirms the payment by webhook, the deposit is recorded on the customer's account as an advance and "Deposit paid" is added to the appointment notes.
- When you later create the invoice, the deposit is applied to it. See Invoices and payments.
If no gateway is connected, the booking is still saved and the customer sees "Booking received. We will contact you about the deposit."
Rules & limits
- The public pages only work while the Tinting module is switched on for your business; the shop also needs Shop live ticked. Otherwise they show "page not found".
- A wrong or old booking key gives "Invalid booking key." Ticking Make a new key stops the old key working, so update the plugin straight away.
- Shop prices and durations always come from your catalogue, never from the browser. The chosen time is checked again on submit: "Sorry, that time was just taken. Please pick another time."
- Time slots respect your open days, hours, bays, minimum notice and book-ahead window.
- The shop only creates a quotation if your plan's monthly job limit is not reached (see Usage limits); the appointment and lead are still created.
- A deposit is only marked paid by the gateway's signed webhook, never by the customer simply returning to your site.
- Bookings are rate limited to stop spam.
- Setting up the shop needs
tinting.manage.
Tips
- Make a test booking with a Stripe test key or Clover sandbox before going live.
- In the shop cart, customers can type a coupon (discount shown at once), a referral code, or a gift card code (noted and taken off the final invoice). See Coupons, referrals and gift cards.
- Requested appointments show on the calendar; confirm or move them there.